
What's the big deal with the pic above? I'll tell you in a sec. There's so many videos and posts about upgrading the Taranis antenna, so I decided to do it tonight.

After peeling off the hot glue, it didn't look too bad. I took off the original antenna wire and the pad is really tiny. I went ahead.
Back to this pic. I soldered the center wire and as I was bending the outer wires with very little pressure and the pad popped off. In the picture, you can see the square copper pad.
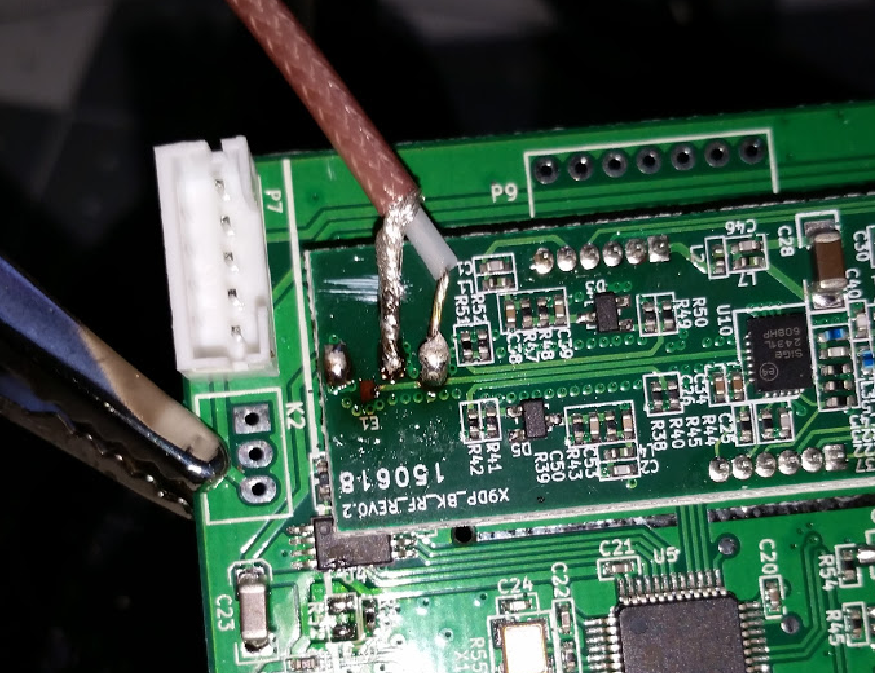
After looking at the cost of replacement boards, I started looking at ways that I might be able to fix it. I scraped away the green coating over the PCB portion that ran to the pad. I was really lucky that the board is printed the way it is. There was very little copper, but I was able to get the solder ball to stick to it.

I used plenty of hot glue to make sure that it never moves.

I used my reamer from RC car bodies to make a new hole for the RP-SMA connector.

Picture of antenna attached.

Side view.
I definitely would not recommend doing this mod unless you are really good at soldering. If I could start over, I would of spliced the old antenna and would have never touched the solder joints.
pretty long cable at the solder points. how is the performance after the modification?
ReplyDeletedid you do before and after measurements?
how about the SWR?
I made the cables longer at the solder joints to make sure there was no pressure on the joints. The exposed copper after scratching off the insulation was extremely small.
DeleteI have not flown since the mod. I have a buddy with the same transmitter and receiver (d4r-ii) and will compare. I hope all the trouble was worth it!
This is a really good read for me, That You Must admitted are one of the best bloggers I ever saw. Thanks for posting this informative article.
ReplyDeleteTwist pin connectors